Staff

Introduction

This section is for you if you are part of the desk staff like an Analyst or a Technician.

Since the desk is highly customisable, exact features available will depend on the features which have been enabled in your installation of the desk.

Please refer to the sections based on availability of your version.

Idesk aids in automating ITIL Service Desk function under the Service Operation process, namely:

  • Incident Management
  • Event Management
  • Service Request

Also, from a holistic ITIL point of view, it additionally addresses parts of the following:

  • Knowledge Management and
  • Reporting

The design of the system is based on several years of experince of actual professionals who have been part of a service / help desk and extensively understand technician's and customer's practical issues in managing and using such systems.

The techical design of the desk provides for simplistic and fast integration to other applications inside the organization. Though small in size, its extensive configurability capabilities makes it an ideal platform of choice.

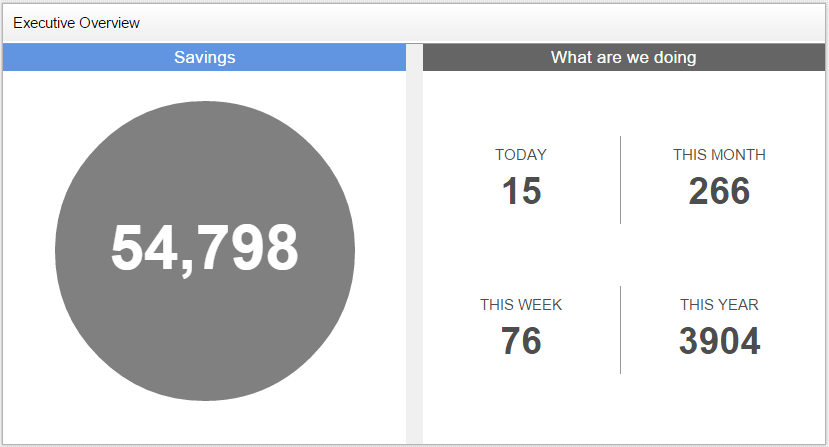
This section provides an overview of the system.

A good understanding of content and ideas here will also help you find your way around the system.

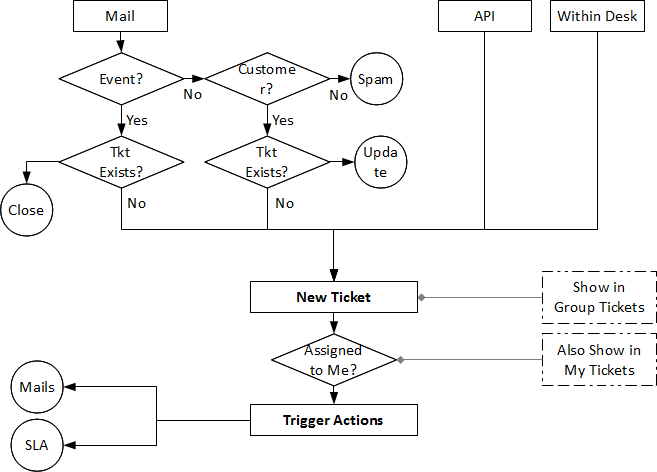
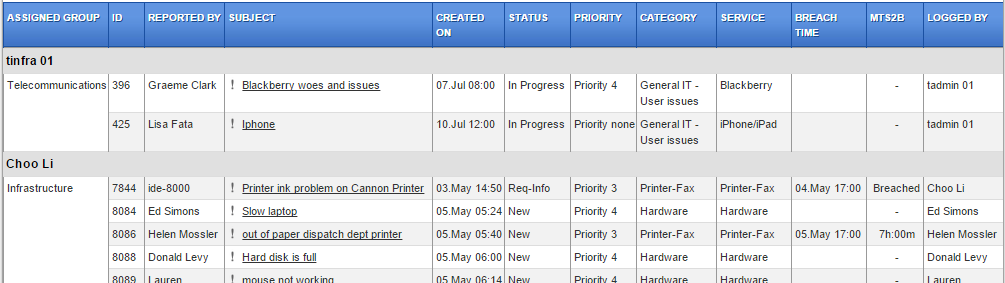
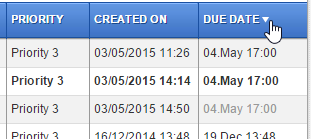
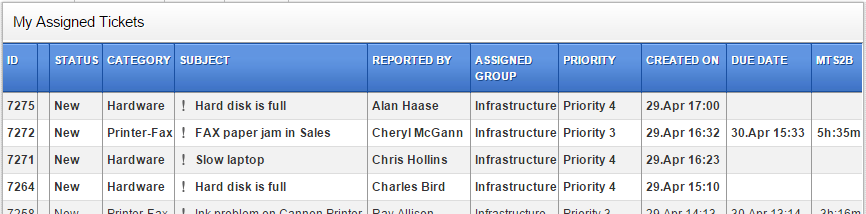
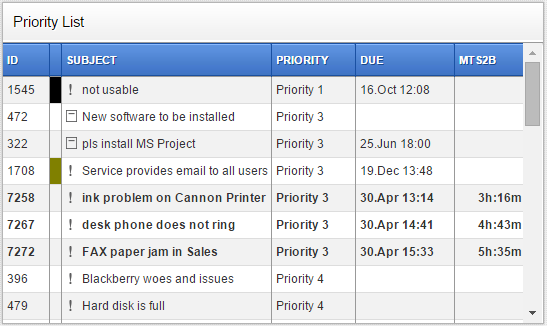
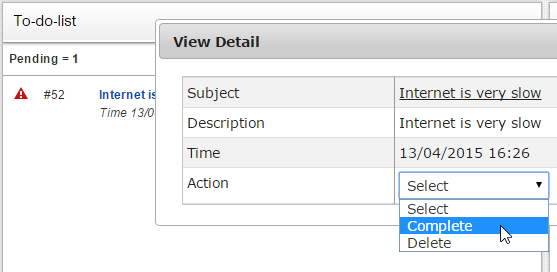
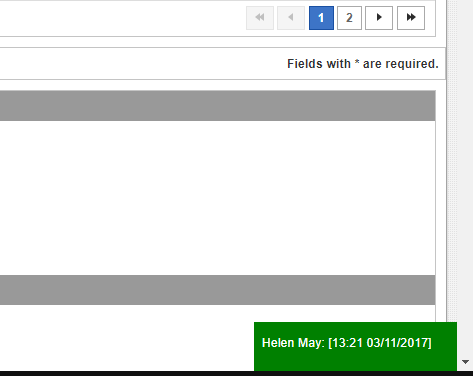
All new tickets are bolded so it is easy to distinguish if an action is needed by a staff member. Also, if a SLA fix time applies, the timer starts for a ticket coming into the desk.

The timer pauses whenever a status is applied which is defined within the system as a PAUSE state. An example is Waiting For Customer.

In any case, whenever a member of staff opens a ticket, it is marked as read and the bold text changes to normal. If a staff memer decides they can not work on it, they can mark the ticket "Mark as unread".

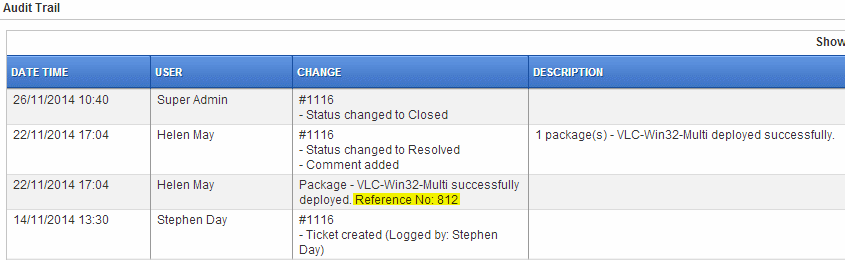
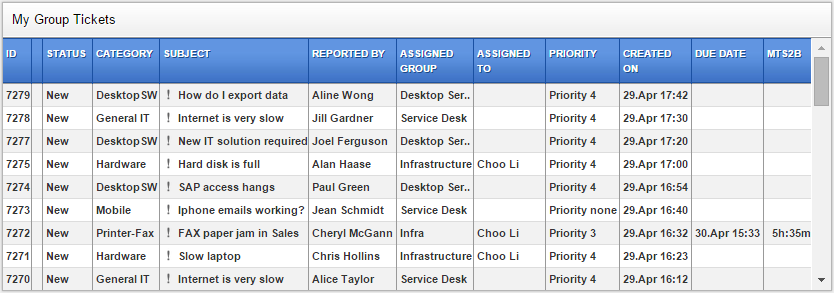
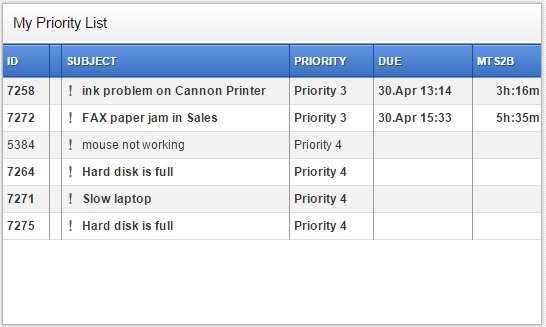
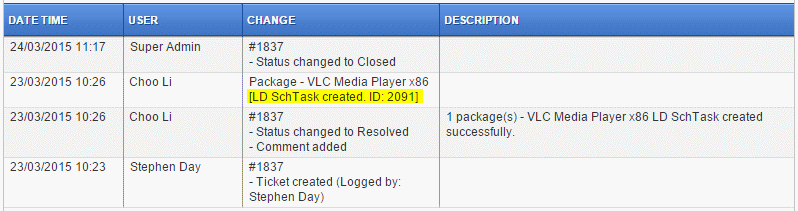
I the member decide to start working on the ticket, it is a good idea to mark the ticket "In Progress" or whatever it may called within your desk. This indicates to toher staff members that someone is already working on it. The information is in the Audit Trail at top of a ticket.

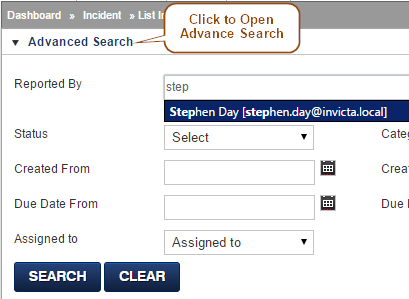
For purposes of this introduction, let us assume that the desk has been configured with the following Status settings:

  • New
  • In Progress
  • Waiting for Customer (Pause Timer)
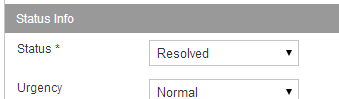
  • Resolved (Pause Timer, allow Acept/Reject)
  • Closed

In case the staff member needs further information from the cutomer, they can add a comment and mark the ticket Wainting For Customer. This pauses the timer till the customer responds. At the customer side, as soon as they submit the info, the ticket would be marked back as "In Progress" and marked with bold text again. Additionally, since the In Progress state does not have a pause state defined, the timer would start counting down again till either the ticket is marked back to the customer or resolved and marked Resolved.

In the Pause Timer state, if the desk has been setup to auto-close tickets after a certain period of time, the ticket will be, well, auto-closed.

If the desk has been setup to allow customers to Accept or Reject a resolution, the ticket will follow the workflow accordingly. In our example setup, ticket is marked to go back to In Progress if the customer rejects the resolution or to Closed if Accepts the resolution.

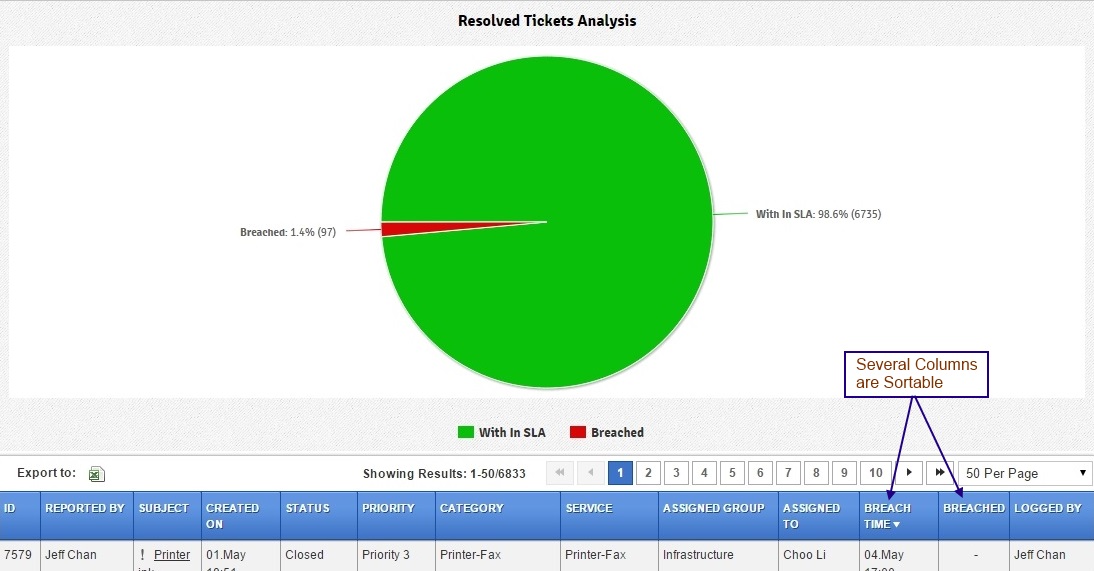
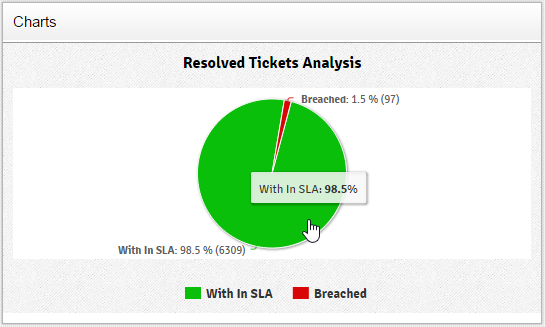
Closing a ticket marks the end of the workflow and details of the closure time are recorded for analysis. If however, defined SLA was not met, the ticket would show up as Breached in analysis and reporting.

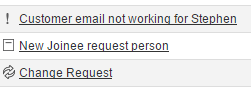
Event tickets: Since there's no customer for events, Event Tickets would go from New->In Progress->Resolved->Closed cycle.

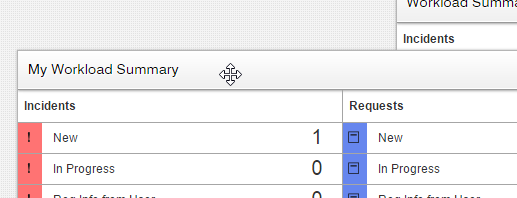
With this top level view it should be straight forward to work with the desk and understand what's going on.

Finding your way around

The desk has been designed with latest UI/UX features and is fairly intuitive.

It also has several adaptive features built into its architecture which allow you to work and access the desk from nearly all modern devices including laptops, desktops, tablets and smart phones. In fact you can access the desk from any device capable of accessing the internet via a web browser.

As discussed earlier, several areas of the desk are customizable and exact look & feel and features in your version will depend on what how the desk has been setup in your organization.

As a general idea, here's how the top navigation bar looks. Notice how it is different based on features available. You would also notice that the navigation bar has designed to be "sticky" which means as you scroll down the page, the bar would stick to the top providing you access to navigation more intuitively.

In general, features available are dependent on the Role you have been assigned within the desk and often setup, assigned and maintained by the desk's admin.

Adaptive navigation in smaller screens

Quick access to Knowledge Base articles

There's a quick search box located at the extreme right hand of the navigation bar area. A great feature of the box is that for new browser tabs are used to start new searches. This is a huge navigational advantage for situations where you are in the middles of some un-saved edits and want to search for information. However, the auto detect feature detects once a new tab has been opened, further searches do not open more new tabs but rather stay on the same page.

Messages area

As you work with tickets to take actions with the desk, messages provide visual feedback of success(or failure) of actions taken. Here's an example message after updating on a ticket.

This area is also used for high priority system level alerts. Here's an example:

Special Icons

Throughout the system, there are several areas specially within Reports where a single table displays tickets for both Incidents and Service Requests. These tickets are distinguishable with an icon just before the start of the subject line of the ticket. See example below.

Other Visual feedback

There are several tables listing tickets each showing data in line with the context of the dataset being viewed. Several column headings are sortable and clicking one that has its sortable property enabled causes the table to be re-sorted based on values in the column. The mouse will change to a hand cursor if the column label is sortable.

In addition to the presentation of the data, at times the font and style of the text also provide additional feedback. See the following case and an explanation:

  • Hand cursor indicates column is sortable
  • Down arrow or Up arrow indicates sorting direction(smaller to bigger or bigger to smaller depending on the context)
  • Clicking the colum head again reverses the sorting direction

Notice the text style in the column:

  • Bold: Ticket is unread by desk staff
  • Normal: Timer is running on the ticket
  • Grey: Ticket is in a Pause state

Advanced Search

Export data

The Dashboard

The Dashboard is the first location opened after logging into the desk.

[Note: You might be taken directly taken to a url if you logged into the desk after clicking or pasting a url, like, for example from an email ticket url]

The dashboard is made up of several "panels" each providing a certain piece of information arranged to make it easier to focus on what is critical. Read on to see examples of panels and what they do.

The Panels

Dataset

What tickets you see

The introduction section explains what features of the desk are avaialable to your 'Role'. In addition, your 'Group' membership/s determine what tickets you see.

To explain this further, let us say the desk has two groups Service Desk and Infrastructure.

If you a member of Service Desk alone and not of Infrastructure, you will only be able to see tickets assigned to the Service Desk group and not one's assigned to Infrastruture. Further, all through the system, areas like reports, tables, Tag clouds and so on will present data on this subset of the desk's full dataset.

What tickets are on the Dashboard Panels

All tickets needing action to be taken by a staff member!

Tickets go through a workflow as defined by your installation of the desk. Some locations within the workflow might require action from the customer or may already have been resolved by a staff member. These tickets can be classified as tickets not needing further action by a staff member. These tickets can still be quickly reached by clicking on the workflow location from the Workload Summary panel or through Advance Search on most tables.

Drag N drop

Depending on what you prefer to see "above the fold" you can reposition panels based on your work preferences. All dashboard panels have drag-and-drop enabled. Once a panel is moved, the desk remembers your personal preference and automatically stores that information. You do not need to take any further action to save panel settings.

Note: In case settings are not being saved, in most cases this is a folder permission issue on the server. Ask you IDesk admin to ensure all required folders for the desk have necessary write permissions enabled.

Auto refresh

As you work with the dashboard, you will notice a "working" icon like shown in the screenshot below indicating the panel is contacting the server for updated information.

Most panels are set to refresh every one minute except the charts, tags, announcements and executive overview panels which only refresh every 30 minutes.

Working with tickets

Tickets can be broadly categorised as Incidents, Service Requests or Change.

Throughout the system, various tables might show all types of tickets in a single table. In this case, special icons represent what kind of ticket it is. See an example graphic below.

Managing Tickets

It is usual for new tickets to be routed to approprite groups or staff depending on how Service Items have been defined.

For example, a Service Item rule called Hardware could assign tickets marked with Hardware to be assigned to the group Hardware. Similarly, a generic srvice item may have been setup in your instance called Customer Ticket and gets assigned to Service Desk group.

A Service Item can also have a staff meber pre-assigned for a service item. So, say a service Item called Mobile could be assigned to Mobile Group AND also to a staff member called john.doe.

Depending on how the desk has been setup, a new ticket shows up on your dashboard.

Clicking on the ticket opens up the ticket in edit mode. (Note: Closed tickets can not be editied any more)

Top section of a ticket shows the Audit Trail and any previous actions taken on the ticket. Once a ticket has been opened (by any memeber of the staff) the ticket's bold entry on the dashboard and other locations turns to normal text indicating someone in the desk has opened it.

Once you start working on a ticket, it is a good idea to change the status of the ticket to something like In Progress. Customers will also see the status on their respective self service portals.

For this illustration, we assume your desk has been setup with the example status labels as shown in the administrators section of this help documentation. The staus labels are:

  1. New
  2. In Progress
  3. Waiting for Customer
  4. Resolved
  5. Closed
Creating Tickets


Simultaneous Ticket View

In a collaborative situation, it is useful to know if another user is on a ticket at the same time. A unique feature is available within the desk for analysts (that is any non-customer role).

When you open a ticket, a small sticky green box at the bottom right of the screen indicates who is on the ticket at the same time as you are viewing it.

This view is not available to customer role. However, an analyst can still see if someone with a customer role is on the same ticket.

Not only can you see who else is on the ticket, but you will also be alerted if another user makes an update to the ticket while you were viewing it. The box turns red. A refresh link will also be displayed so you can view changes on the audit trail of the ticket.

Note: Minor updates (like changing category and so on) to the ticket do not count towards update.

Managing Change (Tickets)

If the Change tickets module has been enabled, you can manage and create a special type of tickets to manage Change in your organisation.

Change tickets area should look familiar as it is pretty similar to Incident and SR tickets. However, there are some important differences. There are some extra fields available which relate to managing change. See graphic below

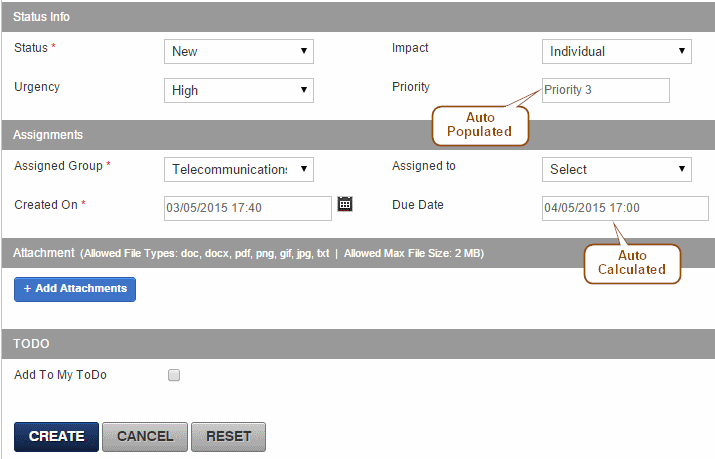
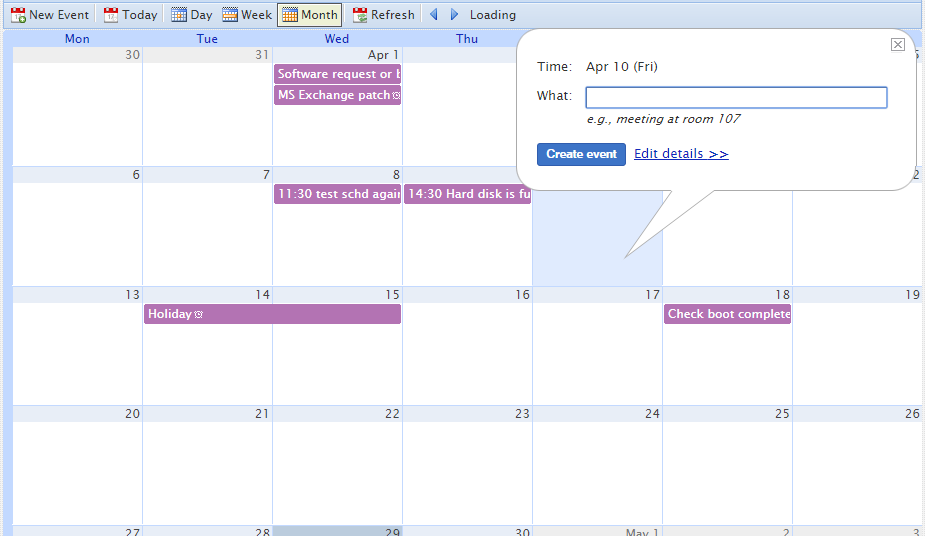
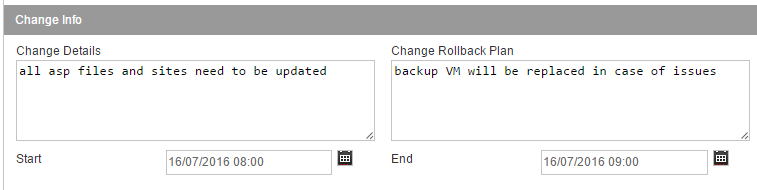
Specially note Start and End fields. These define your Change schedule and can also be viewed under list of change tickets.
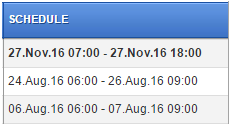
Change Flow

Let us look at a typical flow for Change Tickets.

Say we initiate a change ticket, select a Workflow and save the ticket. This would no initiate a workflow. After all approvals have been processed, we come back and setup a start and end date for the change. This is now visible at a central location under the list of Change tickets.

Approvals in Tickets

The desk provides an extremely powerful capability of Approval workflows.

Since this feature is configurable, exact functionality may vary on how it has been setup in your instance of the desk. This section provides a generic overview.

Once an Approval workflow has been setup by an administrator, it is available for all staff users. An Approval can be triggered in of the two ways.

From a Ticket

If there is no previous workflow initiated on a ticket, available workflows can be selected from a dropdown list next to the Service items selection.

This is an extremely useful feature allowing you to initiate a workflow at any active stage of a ticket. For example, a request for additional hardware or a specific software might need an approval from someone inside the organisation.

Auto Initiated on a Service Item

A default Workflow can be applied during creation of a service item. This means, any ticket created using that service item will auto initiate a workflow. This is a great set-it-forget-it feature.

A useful example is you could create a New Joinee service item, which automatically initiates a workflow for other team members to perform tasks who are not staff members within the desk!

Knowledge Base

For an introduction to searching knowledge base, refer customer/search-kb.

Note: You must have requisite permissions provided by the application administrator to create/edit/delete kb articles. If you do have permissions, you will see an Edit Article button when viewing an article. This makes it easier to update an article if you find you need to edit any information.

Creating / Editing

Idesk comes with a full WYSIWYG editor for adding and editing content within the knowledge base.

Who can Search and View a KB article

As in the graphic above, both customers and tech staff can search and view this article. This is a great feature which helps you to restrict articles based on user roles.

Working with images and media files

Due to security context under which a browser runs, directly pasting media files into articles in edit mode is restricted. It is still easy to work with such files and all that is needed to be done is to upload the file through the included Image management tool.

Another advantage of such an approach is when working with large media files already published on the internet or intranet, the files do not need to be copied on the desk's server and can be directly linked. This saves some resources on the desk's side and also shows the latest version by using a single source.

ToDo - Scheduler

Working with Ivanti (LANDESK)

INVICTADesk for LANDESK, contains a powerful set of libraries and is fully pre-configured with integration into LANDESK Management Suite.

This facilitates inspection of asset inventory management, automated software deployment and remote control of machines all from within an open incident in INVICTADesk without the need to open the LANDESK console. Following actions are available from with the desk:

  • Dynamic / real time hardware and software device Inventory from LANDESK Server
  • Directly Remote Control device
  • Schedule a software deployment job including choose method of deployment
  • Automatically update incident with software deployment status including job complete
  • Automatically notify user of job complete status
  • Uninstall / remove software with automatic incident updates
  • Full audit trail
  • Dynamic interface with smart phone, PAD and computer screen support

In addition to the above, you can also

  • Log / open an INVICTADesk incident from within the LANDESK console
  • View tickets for machine owner
  • View tickets for asset

Gettig Started

To invoke asset's data and fetch it in real time, locate the following on an active ticket.

If the icons are disabled as in the sample graphic below, either the inventory was not found in LANDESK or the server is not reachable.

Contact your desk administrator for further information if you encounter the above scenario.

Inspecting Inventory information

Click on any of the tabs to get more details on each of the categories. For package deployment see next section.

Package Deployment

Note: Package List command button will be disabled if the ticket is unsaved. A message will be displayed prompting you to save the ticket before invoking the package deployment feature. Make sure the ticket has been saved prior to invoking this action.

Clicking Package List opens the following popup window so that you can complete the deployment.

Feedback

After clicking deploy, a request is sent to LANDESK. Task ID returned by LANDESK is logged in the audit rail for traceability(shown highlighted in the screenshot below). Other information is logged in the ticket's Audit Trail and, if successful, ticket is marked resolved.

With ticket's status being changed, an email is triggered and sent to the user.

The ticket is marked Resolved. This is so that the user can rpovide feedback if faced with any issues. Based on the Auto Close settings ticket is closed by the system as in the following graphic.

Remote Control

Refer to the first graphic in this section and notice the Remote Control icon. Invoking this opens the LANDESK remote control function using the browser. Provide your login details for LANDESK remote control and continue.

This is a powerful feature from LANDESK which aids in managing remote machines from within your browser without installing any additional software.

Working with SCCM

INVICTADesk for SCCM, contains a powerful set of libraries and is fully pre-configured with integration into Microsoft SystemCenter SCCM.

This facilitates inspection of asset inventory, software deployment and remote control of machines all from within an open incident in INVICTADesk without the need to open the SCCM console. Following actions are available from with the desk:

  • Dynamic / real time hardware and software device Inventory from SCCM Server
  • Directly Remote Control device
  • Schedule a Application/Package deployment job including choose method of deployment
  • Automatically update incident with software deployment status including job complete
  • Automatically notify user of job complete status
  • Uninstall / remove software with automatic incident updates
  • Full audit trail

In addition to the above, you can also

  • Log / open an INVICTADesk incident from within the SCCM console
  • View tickets for machine owner
  • View tickets for asset

Getting Started

To invoke asset's data and fetch it in real time, locate the following on an active ticket.

If the icons are disabled as in the sample graphic below, either the inventory was not found in SCCM or the server is not reachable.

Contact your desk administrator for further information if you encounter the above scenario.

Inspecting Inventory information

Click on any of the tabs to get more details on each of the categories. For package deployment see next section.

Application / Package Deployment

Note: Package List command button will be disabled if the ticket is unsaved. A message will be displayed prompting you to save the ticket before invoking the package deployment feature. Make sure the ticket has been saved prior to invoking this action.

See screenshot below for display of Applications and Packages.

This is an example and the exact list would depend on how your SCCM installation is setup.

Click on the Application / Package and click DEPLOY.

Clicking Package List opens the following popup window so that you can complete the deployment. Applications and Packages need to be created/available in SCCM. The desk only reads this from the server.

Feedback

After clicking deploy, a request is sent processed depending on the membership rules. The process result is logged in the audit rail for traceability (see screenshot below). Other information is logged in the ticket's Audit Trail and, if successful, ticket is marked resolved.

With ticket's status being changed, an email is triggered and sent to the user (dependent on the outgoing mail rules set under mail settings).

The ticket is marked Resolved. This is so that the user can provide feedback if faced with any issues. Based on the Auto Close settings ticket is closed by the system as in the following graphic.

Remote Control

Refer to the first graphic in this section and notice the Remote Control icon. Invoking this opens the SCCM remote control function. Note: You must have SCCM Remote Control software installed on your machine and created required entries in your registry to invoke sccmrc:// uri.

Working with IPass

This section explains the desk side if IPass has been integrated with Idesk.

The first topic to understand is that since IPass is a self contained application, it performs all password reset activities and only passes status information to the desk. The desk has all the lgoic to handle received data and take necessary action, namely:

  • Extract User information
  • Create a ticket
  • Automatically close the ticket

If processing has been successful, the ticket never shows on the dashboard as it is directly sent to the closed tickets list. This makes sense as no further processing is required by the staff. In this case, the ticket can be found under Closed. The list of all IPass tickets can also be reached from the Tag cloud on the dashboard if Tags have been setup properly within IPass service item. Following shows a sample entry in the list of closed tickets.

IPass details received are logged into the ticket description field and the subject is populated into the subject field:

and ticket is marked:

Note the Audit trail: User using the password reset service is entered under the User column but the ticket is logged under user IPass.

Since the ticket enters the workflow in any case, if notification for new/closed tickets has been enabled for users, an email is also triggered.

Under certain conditions IPass tickets can show up on the dashboard. These are:

  • User in IPass data is not in IDesk's user list
  • IPass Result Code was anything other than Success
  • Any other processing failure

Such tickets may need further action and hence are not auto closed.

Other Utilities

Depending on what permissions have been granted to your role, there are two other utilities provided within the desk.

The first is a Link on the top navigation bar which, when clicked, launches the IPass admin entry point in a new tab.

The second is a link which launches the Help Desk IPass entry point in a popup and is useful in case you need to provide support. Contact your Desk administrator for further information.

Working with IPulse

This section deals with enhanced features available in Idesk if IPulse has been integrated.

Idesk side

Modified view of Ticket form

The Navigation Bar in Idesk can have an extra icon to open and auto-login to IPulse from Idesk. For auto-login to work, an administrator should have setup your account in IPulse as an authorised auto login user and allowed auto login for your Role in Idesk.

Asset area

The icons shown above are enabled if the asset is found in IPulse list of assets. Since Idesk can contain local assets as well, these icons appear greyed and the mouse cursor shows disabled for assets not in IPulse.. Additionally, the icons can appear disabled if the Pulse server is not accessible at that time.

Inventory Detail screen

Package Deployment

After clicking deploy, a request is sent to IPulse. The status is logged in the ticket's Audit Trail and, if successful, ticket is marked resolved. With ticket's status being changed, an email is triggered and sent to the user.

The insertion of the request in Pulse generates a task id which is captured by the desk and, for traceability, added to the audit trail information. See highlighted text below.

IPulse side

Find the above link in IPulse to get list of computers managed within IPulse.

Clicking on the icon to invoke Idesk interface would load the following pop-up form.

Trouble shooting

In most cases, problems working with the interfaces above can be caused by your browser's pop-up blocker. Add the Ipulse and Idesk urls to your safe list.

Reports

Built-in Reports

Top Ten

The Top Ten is a great report to quickly focus on the well, Top Ten topics disected by various topics. Additionally, each datapoint can be drilled down to view a list of tickets with lots of additional details. As an example see screenshot below.

The Top Ten is a long-ish report. Click the icon below to open a larger preview of the report.

Who-did-what analysis

Individually..

.. and within a Group.

Performance Reporting

This report generates a snashot view of SLA performance. [Note: Open or in progress tickets are not incuded here for analysis]

Eye on SLA

Opposed to the Resolved Tickets Analysis report above, the "Open Tickets Which Have Breached / About To Breach" report helps track existing SLAs and warn on MTS2B (Minutes To Breach).

Staff Workload

The last two reports are a great way to analyse who's-doing-what. The first shows Individual workload and the next Group workload.

It is also a great way to keep an eye on tickets in the system which might not have anyone assigned but may need attention.

Here are two snapshots of Analyst Workload List. The first shows assigned tickets in an analyst's basket and ..

.. this shows group wise un-assigned tickets.

And here is the Group Workload List. Notice that the first snashot does not have an analyst which indicates these set of tickets under the assigned group do not have an analyst assigned.

Another slice from the Group Wrokload List showing Tickets assigned to a Group and additionally a subset of who has been assigned those tickets

Personal Settings


Your own tickets!

All is fine so far with viewing and solving tickets, but where are your tickets?

Under menu item Incidents & SRs, see link My Tickets. Clicking this opens a table with all your tickets listed.

All tickets here are defined as tickets either created by you as also tickets which have your name in Reported By (user).

Mail based Commands

This is a fantastic new feature introduced in version 1.10.1 on an experimental basis.

Note:

  1. This is only available to Tech users (only users who are non-customer users)
  2. Each command needs to be on a line by itself. See examples below.

Three commands are available called PLUS commands. Each starts with a + sign:

1. ++status: Status commands: You can change the status of the ticket from an email. For example, if your install has a status called Resolved, use the following on a line by itself:

"...This is some text you want to add as comment.

++resolved

"

2. +@assign: Assign Commands can take three forms: +@assignGroup, +@assignTo, +@assignGroup/assignTo

So, if you would like to assign to a group, say Infrastructure, use +@infrastructure

In case you want to assign to a user, use the first part of their email id (before the @ part). So, for jondoe@yourdomain.com, use:

+@jondoe

Do remember, this would work only if this user is already part of the group that the ticket is assigned to. This is a great way to assign a ticket to yourself, for example.

You can also assign to another user, in another group by using group/user format:

+@telecomm/janedoe

3. ++rc: Restrict comment: The restrict comment feature available on a ticket can also be applied via email by using the: 

++rc

command

The commands are removed from the mail body before being logged, but are logged in the audit trail for future reference.

Close
...